The workbench continues. Finally got some great red and white oak from the Asheville mountains, and I’m ready to complete it.
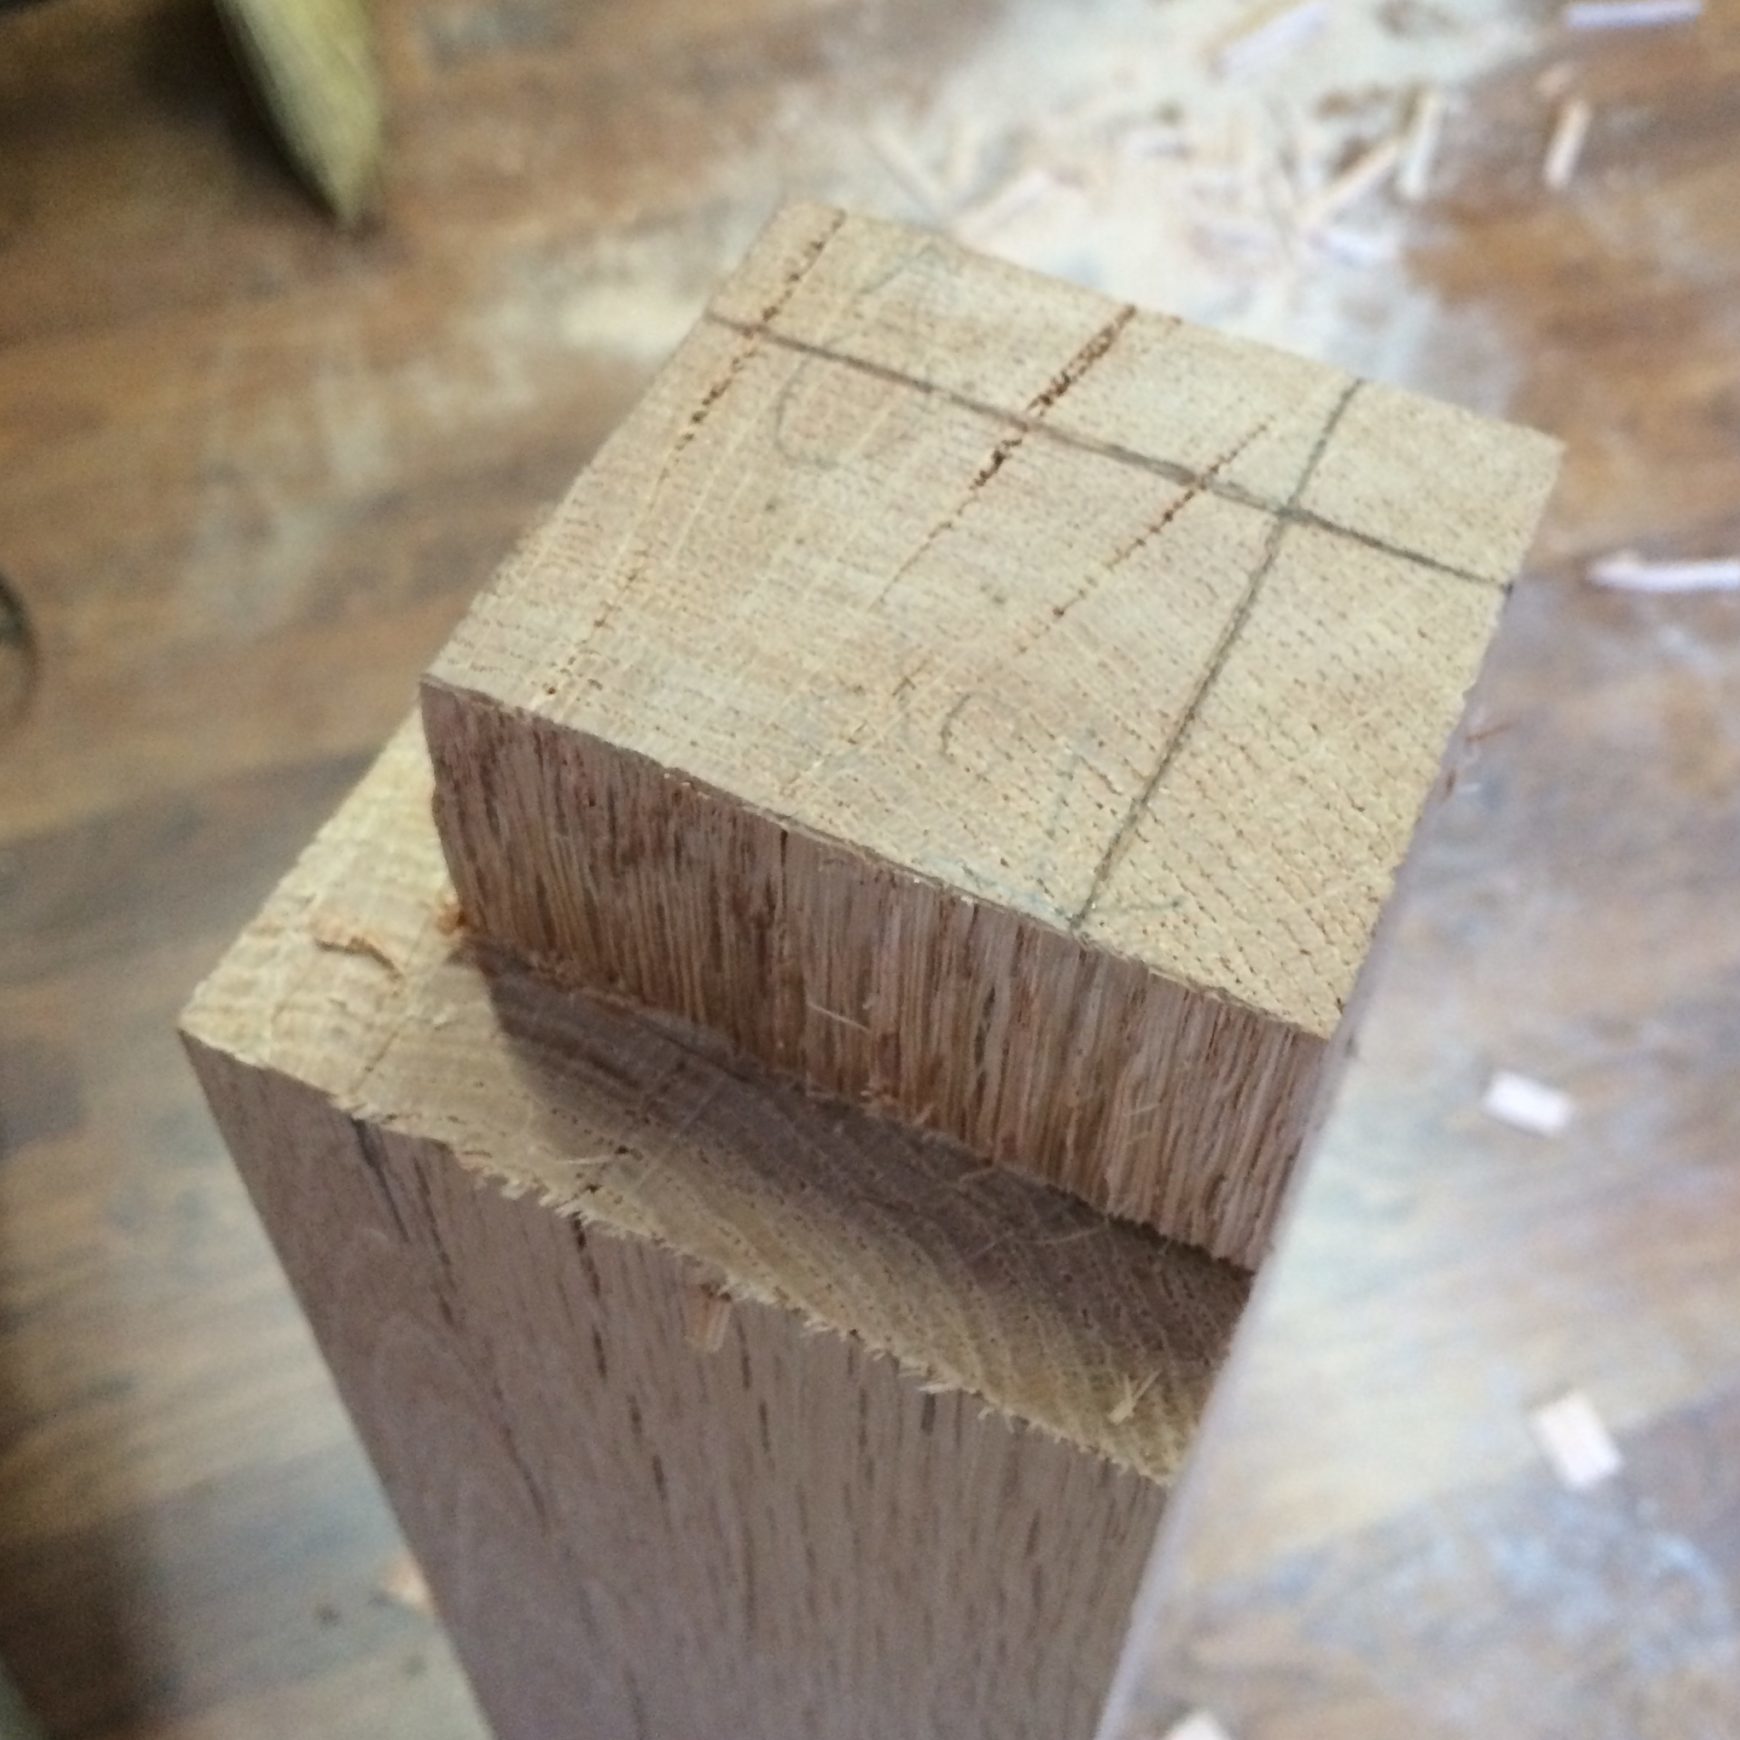
First, need to notch out a spot for the parallel guide on one of the legs. I made the first cuts on the bandsaw, then chopped out the waste with a chisel.


Then the huge leg tenons that will fit into the workbench top.


Then the mortises for the stretchers.

Which are drawbored and pinned.


And set #1 is complete!

While working, I found this date scribbled in my great-grandfathers tool chest. 1936!

Petit Roubo Workbench Build
This post may contain affiliate links. By clicking and purchasing, I may receive a commission. Thank you for supporting Bench Reviews!


2 thoughts on “Petit Roubo Workbench Build, Part 4: Legs (1/2)”